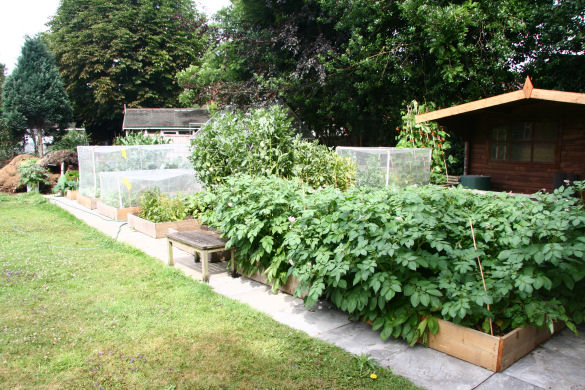
The Plot: |
Raised BedsOur early attempts at gardening ran along traditional lines. Dig over the plot every back end putting in lots of compost. Plant your crops in rows with gaps in between to walk down to get at them. You end up doing quite a lot of hard work every year and you also end up traipsing the mud from your garden back into the house every time to go to harvest something after it has rained. We bought and read an awful lot of gardening books and in one of these we came across the idea of raised beds. In their simplest form you make a mound of earth longer than it is wide. The width is such that you can reach the middle from the side with your out-stretched hand, so no more than about four feet wide. The length is a bit more tricky. The longer you can make them then the more ground you have in cultivation rather than being wasted as paths. However the longer you make them the more tempting it is to walk across them to take a short cut. Our early attempts were simple raised beds about four feet wide and about fifteen feet long. The idea is quite simple. You double dig the ground to make it easy for your plants to grow down into and you put in lots of compost to give the soil some structure and to aid water retention.
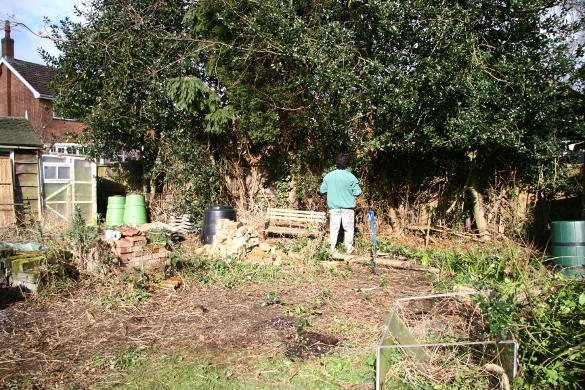
Thus far it is not that different from traditional cultivation, but now for the clever bit. Once you have dug it over, never walk across it again. If you don't walk over it then it will not become compacted. If it isn't compacted then you don't need to dig it every winter to loosen the soil up. All you need to do is hoe some compost into the top once a year to keep up fertility. You may need to dig the beds over every few years, but if you grow in a rotation scheme and you have potatoes in that scheme then you don't even need to do that. The act of harvesting your spuds will provide all the digging that is necessary. So there you have the "no dig" system of raised beds. Quite a bit of effort to establish, but then easy to maintain. The added benefit is that you can cram more plants in than using traditional methods because the soil is more deeply cultivated allowing the roots to go down to the moisture retentive soil below rather than sideways into the roots of other plants. This means that you can plant them closer together without adverse effect. With the plants being closer together there is less room for weeds to become established and any that do get smothered by the plant cover. You also don't need to leave gaps between rows of plants for access, you simply reach in to tend for and harvest your crop. You can plant the crops in blocks rather than rows, again getting more plants into a smaller area. Even with this system we still got muddy shoes and every year you need to mound the soil back up as it cascades off the sides of the mounds. This is when we decided to try permanent raised beds with some sort of retaining wall to hold the soil in and hard paving in between. Removing the weedsThe first problem to tackle is how to remove the weeds from your proposed plot. If you have plenty of time before you want to crop, but not much time to spend in the garden, then yours is the easy path. Start by hacking down all the weeds above ground level with an old fashioned sickle or a more modern strimmer. Remove the debris and either compost it or dry it and burn it or take it to your local tip. Cover the plot with either thick black plastic or old carpet. Whatever you use it must be completely impervious to light. Dig the edge of the sheeting/carpet into the ground and put old house bricks randomly over the surface to stop it lifting in high winds. Now you start the waiting game. You are trying to starve out the weeds by denying them food in the form of sun-light. This will take some time. If your weed cover is just a few annuals then it will take a couple of months. If you have perennials and worst of all ground elder and brambles then it could take a year or two. This is the least effort method of clearing the plot, but it does take a long time. We wanted crops planted within a few weeks of clearing, so that left plan (b), otherwise known as hard graft. Our plan was to have raised beds with hard paving in-between them to allow easy access. The first stage was, as above, to remove all trace of weeds above ground level. This was done with a sickle to remove the nettles and other soft weeds and a pair of secateurs to remove the brambles and other tougher weeds. With everything hacked back it was possible to recognise the old vegetable plot.
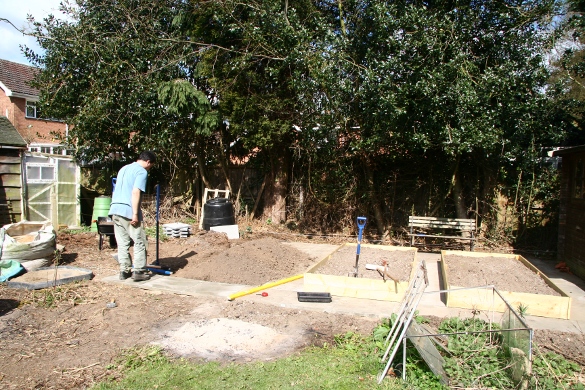
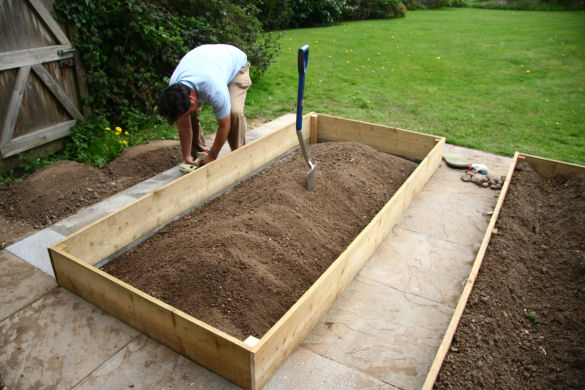
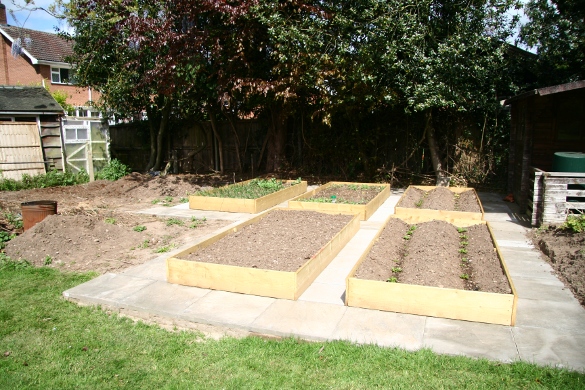
The sensible approach was to concentrate on one bed at a time so that as they were finished we could get them planted up. I started by marking out the area of the first bed and the paths around it. Starting at the back of the plot I removed two spade widths of soil, one spade blade deep, and carried it to the front of the plot. I then worked my way across the plot removing a spade full of earth at a time and sifting through it by hand to remove all weed roots. The sifted soil was then thrown back into the trench left by removing the soil at the start. I carried on doing this until I had dug enough for the width of the path and then the double digging started. The soil I was digging now was going to be under the raised bed so it needed careful preparation. The essence of raised beds is to have deep cultivated soil into which the roots of your plants can grow down into. The simple way to do this is double digging. I carried on digging across the trench as before, but when I came to the end of the row I forked over the soil in the bottom of the trench and removed as many weed roots and large stones as possible. This gives the plants a double spade depth of prepared soil to grow down into, slightly more than that because the beds will be slightly raised by about another half spade depth. I also left a path width either side as single dug earth. The paths will need a firm base and they will act as a very effective mulch to suppress any weeds that survive. When I finally reached the near end of the plot it was a case of sifting through the original mound of soil and feeding it back into the trench and digging under where the mound had been. PavingWe opted for simple slab paths. For the main paths we used 600x600mm concrete paving slabs and for the narrower access paths we used 450x450mm slabs. The idea was quite simple. Start by skimming off some of the soil along the line of the path and piling it up in the middle of the bed. Then firm up the soil you have just carefully dug - well, you need to get the weeds out somehow. Walk up and down on the line of the path and if you have one use a ramming hammer to make it even firmer. The paving under the shed was done over a six inch layer of crushed rubble, a three inch layer of sand, and dots of mortar about three inches thick. That was then, and this is now. Advice has moved on since then and for paving the recommendation is firm up the sub-soil, cover with a two to three inch layer of dry mix of 1 part cement to 6 parts sand and lay the slabs on top. Yes I wasn't impressed either, but I tried it and after one year the paths are still looking good. I used a length of string stretched between stakes to mark out the edges of the paths so that I could keep them straight. I shoveled the dry mix in and firmed it down by walking on it then applied a thin layer of dry mix on top to bed the slabs on.
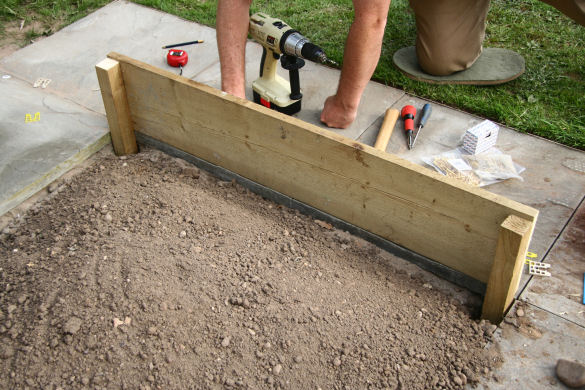
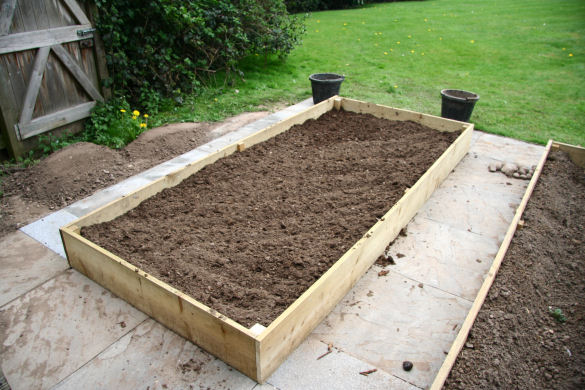
At first I was using a three foot and a six foot spirit level to try and keep the slabs level. This appeared to be working OK until two of my paths joined up on the far side of the bed, they were nearly an inch out in height. I had to rip up the last path and adjust the dry mix to get the slabs to meet. What had gone wrong? As it turned out, nothing. If you use a spirit level to keep a thirteen foot long path level then the accuracy is such that you will be within about an inch. It was then that I discovered that an easier way was to use one of the long planks I used to make the raised beds (about twelve feet long) as a straight edge. The idea is quite simple. Build one long path down the side of the bed using the straight edge as a guide, keep checking with a spirit level though as you go. Then build the shorter paths across the ends of the bed and use the straight edge across the far end of these paths with the spirit level on top. Adjust the height of either path to get the whole thing level, then build the other long path. Each bed was nine feet by four feet so we needed to buy some 600x300mm slabs so that each bed was 4 and a half slabs long (i.e. 4 600x600mm and one 600x300mm) on the main path side and 5 slabs long (i.e. 5 450x450mm) on the access side. The beds were 2 slabs (2 600x600mm) wide. Making the raised bedsOriginally I was going to use brick to make the raised beds but this would have taken longer and used up more space so I decided to use treated timber. It should last for ten years or so before it needs replacing (I hope). We managed to find a local timber merchant that could supply rough sawn, pre-treated timber that was nine inches wide by one inch thick in fifteen foot lengths. This would mean a lot of off cuts. I made four two foot long stakes out of 2 inch by 2 inch treated timber with a roughly sawn point on one end and two two foot long stakes out of 2 inch by 1 inch treated timber. I banged one of the larger stakes into the corner of the bed with a two pound lump hammer, pausing occasionally to check that it was vertical with a six inch spirit level. If the stake was out of true I removed it and tried again. If it kept running out of true the same way then I put it back in at an angle to counter the run out. Once I had it vertical and protruding 8 inches above the path I repeated the procedure at each of the corners of the bed. I then measured the distance between the outer edges of two of the stakes along the short edge of the bed. I measured at the top and bottom and halved the difference if there was any. I then cut a length of timber to suit. This was fixed to the stakes using brass screws. In order to do this I drilled three clearance holes equally spaced down one end of the timber so that they would be on the centre line of the stake. This was repeated at the other end of the timber. I then screwed the timber to the stakes using steel screws of the same size as the brass screws.
I then removed a screw at a time and replaced it with a brass one. If you try to drive the brass screws into the stakes it is too easy to shear the heads off the screws if the stake offers any resistance. This entire procedure was repeated on the other short side of the bed. I then measured the distance between the two short planks along the length of the bed as before, cutting a piece of timber to fit. This was screwed in place as above and then three clearance holes were drilled in a vertical line half way along the plank.
Then I drove one of the smaller stakes into the bed at this point so that the plank could be screwed to the short stake to provide some bracing. This was repeated on the other side of the bed. When drilling the holes for the sides at the corners make sure that the screws will not hit the ones that you have just put in. The soil was then leveled across the bed and five or six bucket fulls of compost were added and worked in. More soil was added if necessary, from the huge pile left over from the shed foundation.
The next bed was easier because I already had the path down one side so it was a case of preparing the ground for the next bed then paving round three sides and adding the wood work. How things progressed in the first yearNo sooner had I finished a bed then we were planting it up.
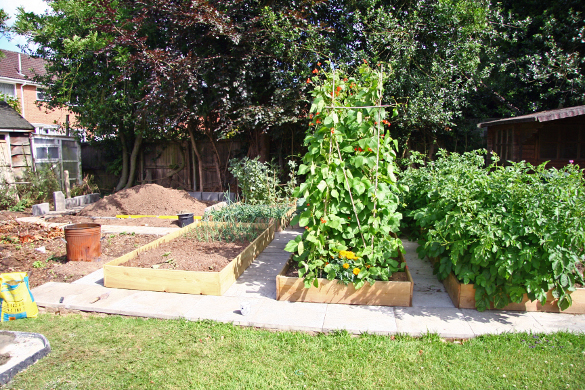
It was all a bit hand to mouth and some things were planted slightly later than they should have been. Having said that we managed to get a fair crop in the first year from the six beds we completed.
By then we had done some more reading and we were aiming at a four year planting plan of potatoes, legumes and brassicas, miscellaneous, roots. In this scheme you plant your peas and beans in a bed and plant your brassicas in a seed bed or pots. Once you have cropped the peas and beans you put the brassicas into the vacated bed. We tried this in the first year and soon came to the conclusion that we needed a five year rotation with the legumes and the brassicas separated out. But we had only built six beds so far, we needed four more by the following year. I managed to get two more in in the first year - too late to plant anything. Between us we then managed to shift the mound of earth left over from the shed foundations and get two more beds in the following year.
That was not the only change from the original plan we drew up all those years ago. As we cleared the ground we started by building the path across the back of the plot and it was going to be longer than we expected. Clearly our original map underestimated the width of the plot by two feet. This meant that we could get a bigger greenhouse in with room for more beds in front of it than we thought we had room for. It also meant that we could have a permanent bed in front of the greenhouse for asparagus. |
Related Pages: |
